
~ Henry Ford
I've got to admit that I've been on a bit of a hiatus on blogging with Showcase lately, but I've been nose to the grindstone creating renderings for several of our customers. You can see them scattered throughout the KETIV website. The renderings I used were either STEP or Inventor Models, but you can also use files from other 3D CAD sytems. I'm hoping I can branch out here now!
I have to admit that there were times that I had to walk away from my laptop, frustrated by the fact that I couldn't 'quite get it right'. But with some help and encouragement from some of the Showcase guys at Autodesk, I was able to get some of the tricks handled.
One thing I had to learn to do was to 'quit thinking with my engineering brain'. With that linear thought process disabled, I started trying things that I didn't think would make a difference.
And to my surprise, these little things made the renderings 'pop'. In other words, the reactions to the renderings when from 'that's cool' to 'wow, that's pretty cool'. With the appropriate effect on my ego. :-)
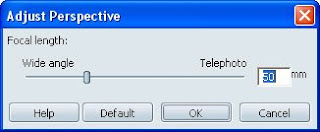
The tricks I want to share is the use of the Tilt, Perspective, and Height options. They change the camera angle and perspective that the rendering is being viewed at.
 (Click to Enlarge)
Each tool brings up a slider that will adjust the camera angle and perspective.
The first example, is changing the Perspective.
The first example, is changing the Perspective.

(Click to enlarge).
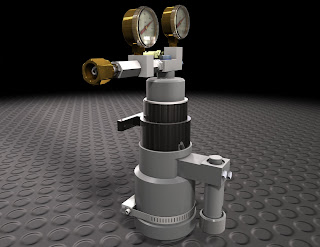
Here's my first picture, with a perspective setting of 50mm. Special thanks to Castor Engineering Inc for providing data for rendering.
'
'

(Click to Enlarge)
Now with the slider moved toward 'Wide Angle' and a focal length of 27mm. Note, this is the only thing I've changed.
Here's an example of changing the Tilt from the default.
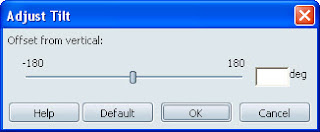
First using the default Tilt angle of 0 degrees. Thanks to California Analytical Instruments for the models for these renderings.

(Click to Enlarge)

(Click to Enlarge)
Here's an example of changing the Tilt from the default.

First using the default Tilt angle of 0 degrees. Thanks to California Analytical Instruments for the models for these renderings.

(Click to Enlarge)
Now with a Tilt of -11 degrees. Just like with the Perspective before, this is the only thing I changed was tilt from one image to the next.


Thanks to Datum3 for providing the model used for this rendering!
First, the default, which is 160cm.
 (Click to Enlarge)
Next, with the Height changed to 52 cm.

(Click to Enlarge)
You can see how something that at first can seem almost trivial can make a huge difference, and I only used each individually, just think what you can do if you combine the effects!
On one last note, don't forget it's all about making a rendering that captures people's attention, and ideally, draws them in. So there isn't some sort of formula that you can type in "X+y/Z" and get "Compelling Rendering". But just these little things can go a long way to making something that will make someone stop and stare.
And that's always fun!
No comments:
Post a Comment